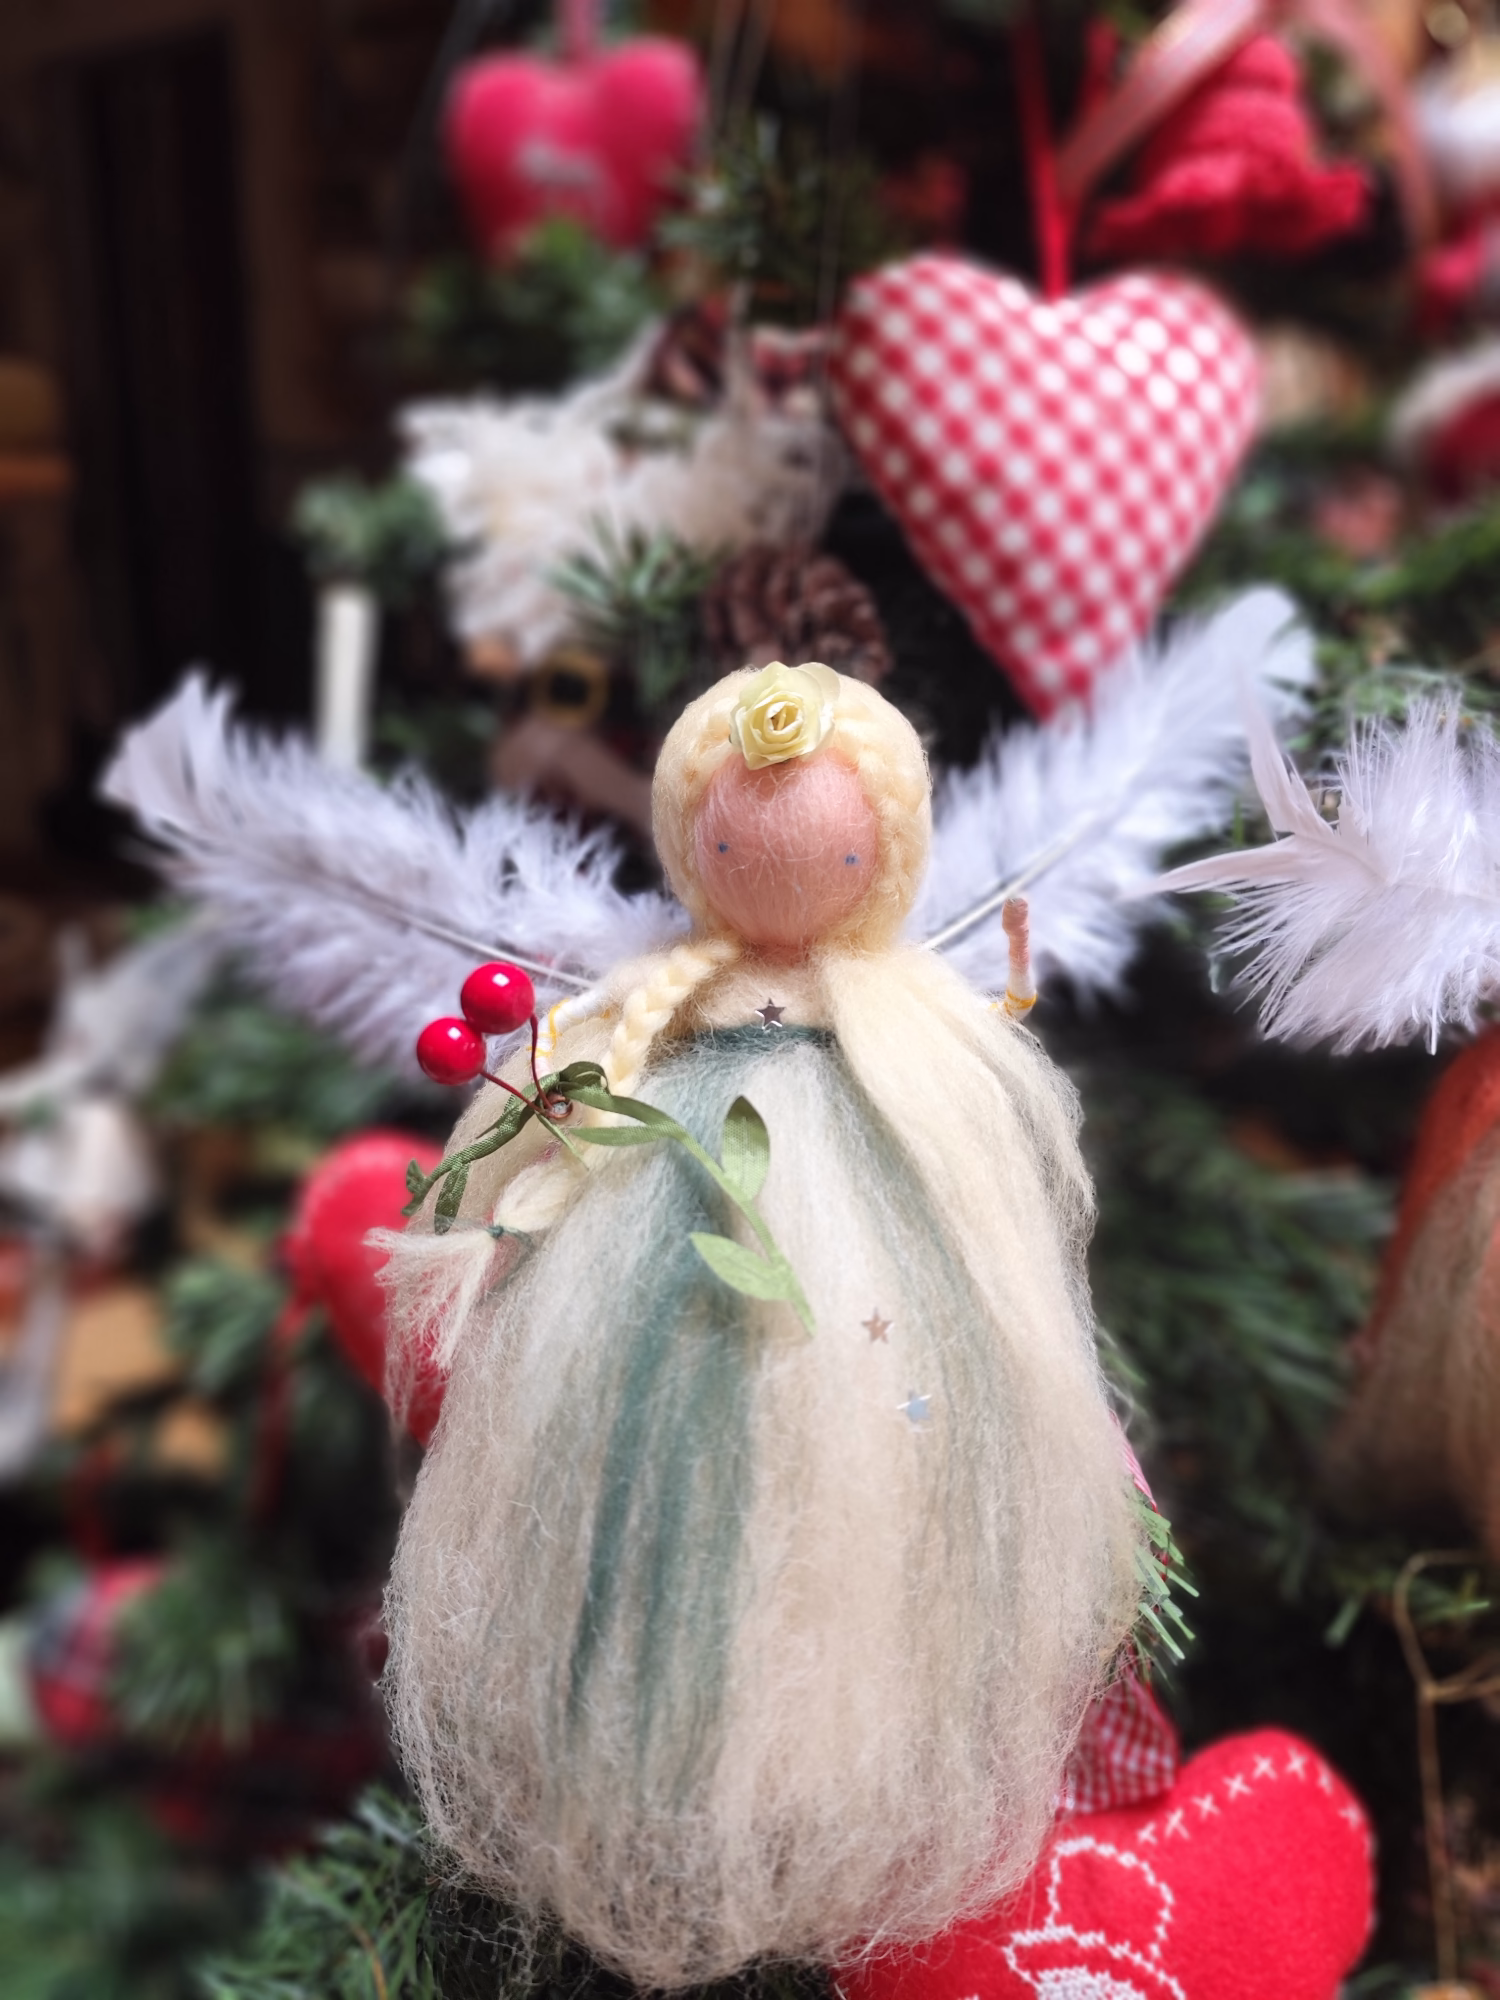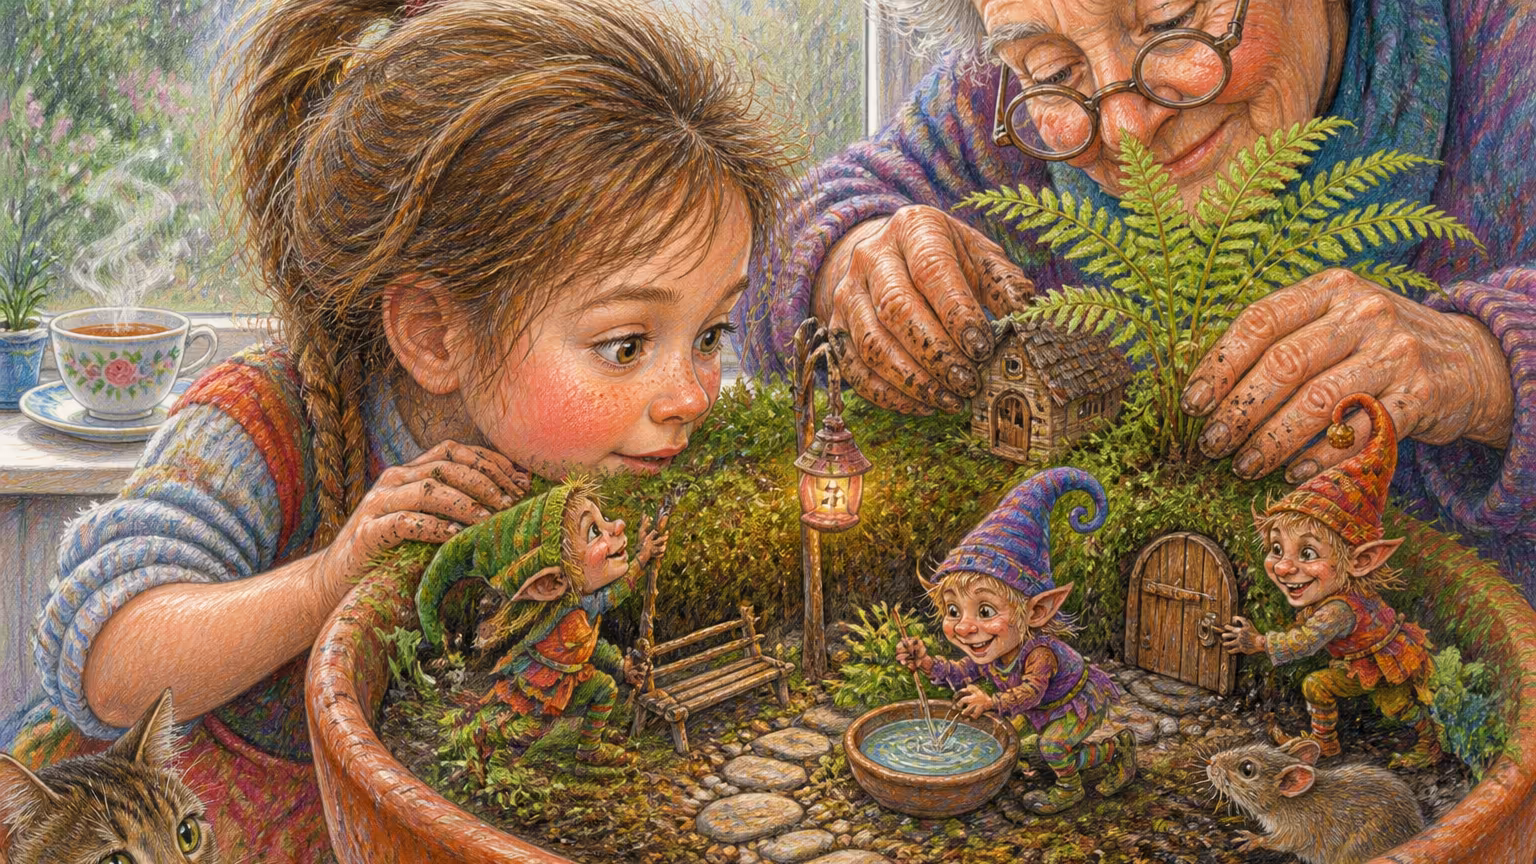
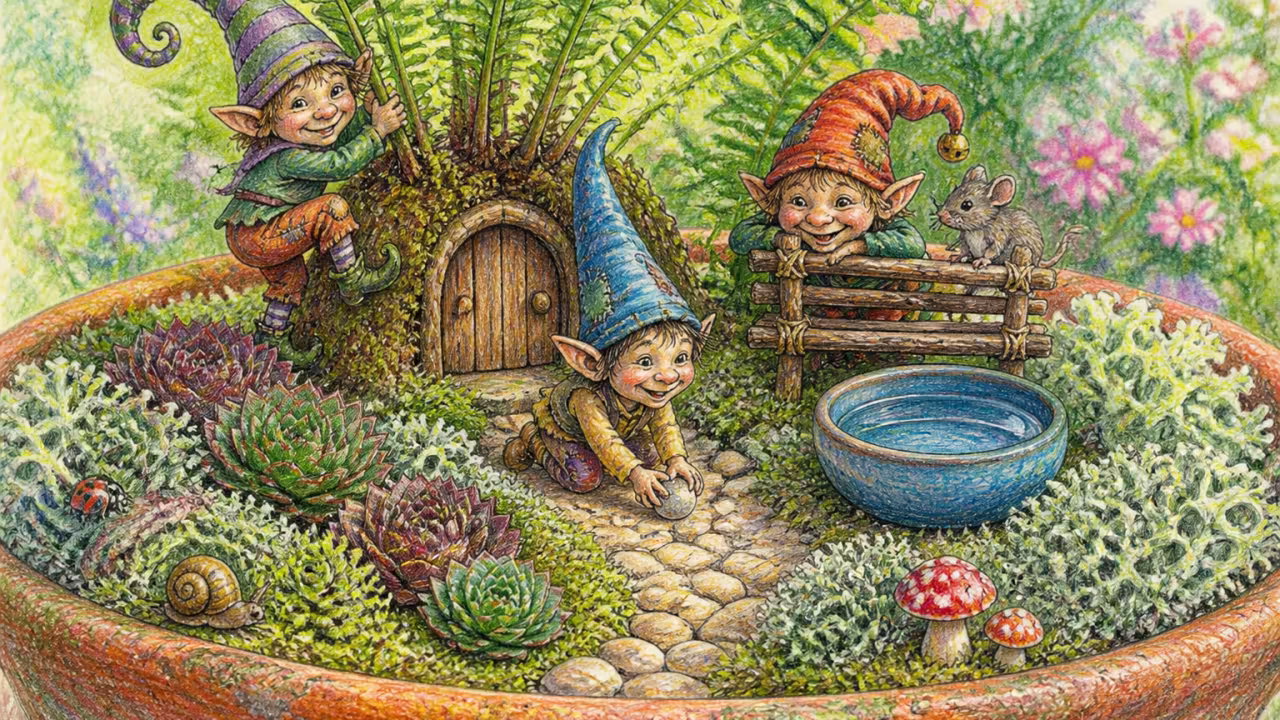
There’s a particular kind of garden that doesn’t need a lawn, a hedge, or anything you’d call land. It sits in a terracotta pot on a windowsill, or in a shaded corner of the patio, or at the foot of an old oak in the back garden. It has a tiny wooden door at the base of a fern, a winding pebble path no bigger than your finger, a bench made from two twigs and a flat stone, and a tiny ceramic bowl of water that always seems to be exactly the right amount full.
This is a fairy garden. And once you’ve made one, the rest of your garden looks oddly oversized.
We Magikitos have been in this business for a long time, and we’re happy to report that fairy gardens are quietly having their moment in the UK and Ireland. Not as a trend, but as a hobby that people pick up in their forties and never put down. Today we’re walking you through what a fairy garden actually is, where to find supplies in the UK, how to build one from scratch this weekend, and how to keep it alive year-round without it becoming a small graveyard of optimism by August.
What is a fairy garden, really?
A fairy garden is a small, handcrafted miniature garden, usually no larger than a dinner plate or a medium-sized terracotta pot, designed as an invitation for fairies and small woodland creatures to settle in. It includes some combination of tiny doors, miniature houses or shelters, a winding path made of pebbles or shells, low-growing plants (mosses, dwarf sedums, miniature ivies), and small details that suggest daily life at a fairy scale: a bench, a well, a clothesline with tiny pegs, a lamp post made of a button and a twig. The point isn’t scale-model realism. It’s suggestion. A fairy garden hints, and the imagination of whoever looks at it fills in the rest.
Fairy gardens belong to a long British tradition of miniature gardening that runs from Victorian parlour landscapes through 1970s bottle gardens to the current moss-and-twig revival. The fairies are a modern overlay (mostly mid-twentieth century onwards), but the love of the very small in British gardening goes back centuries. If you’d like the wider folkloric context, our piece on brownies, hobs, pixies and boggarts covers the older creatures who would happily share a fairy garden with their younger fairy cousins.
Where can you buy fairy-themed garden decorations in the UK?
Across a mix of independent makers, garden centres, and small online workshops that specialise in handcrafted miniatures. The best results in the UK don’t come from large garden chains (those tend to stock identical resin pieces year after year), but from small artisan workshops, often run by one or two people, who carve, paint, and sometimes fire their own miniature houses, doors and figures. We Magikitos work with Carmen at her workshop in Taramundi, and you can browse our fairies collection for the handcarved wooden fairy houses and tiny figures we recommend, along with our treasures for the smaller pieces (lanterns, benches, pebbles, tiny ceramic bowls) that pair beautifully with a starter garden.
Beyond Magikitos, the British fairy-garden scene includes craft fairs in the spring and summer months (the Royal Horticultural Society shows often have small artisan stalls), independent workshops in Cornwall, Devon, the Cotswolds, and southern Scotland, and a handful of well-respected makers on craft marketplaces. The key filter when shopping in the UK: ask whether the piece is hand-made or hand-finished. Hand-made means a person built it from raw materials. Hand-finished means a factory piece had a brushstroke added at the end. The first is what you want.
Which UK suppliers make whimsical garden ornaments?
The British whimsical-ornament scene has clustered around a few regions. Cornwall and Devon, with their long folklore tradition, have the highest concentration of small workshops making pixie houses, fairy doors and miniature village sets. The Cotswolds and parts of Oxfordshire produce more refined miniature gardens with a slightly Edwardian flavour, leaning toward small ceramic figures and stone benches. The Scottish Borders host a smaller but excellent cluster of makers who lean more towards mythological creatures (selkies, urisks, brownies) than the lighter fairy aesthetic. London itself has very few workshops (real estate is the obvious villain), but several London-based independent retailers curate work from these regions and sell it both online and at the few remaining craft markets that still operate weekly.
Our Magikitos shortlist for UK whimsical ornaments combines two filters: workshops that have been making for at least five years (so the style is mature), and workshops where you can speak directly to the maker if you have questions. The combination filters out about ninety percent of the resin-and-marketing operations. What remains is the real thing.
Are there DIY craft kits for making fairy houses?
Yes, quite a few, ranging from simple twig-and-bark assembly kits aimed at children all the way up to full miniature carpentry sets for adult hobbyists. The cheaper kits (under twenty pounds) typically include pre-cut pieces, glue, and a basic instruction sheet, which is fine for a weekend afternoon with kids but doesn’t produce a piece that lasts more than a season outdoors. Mid-range kits (twenty to fifty pounds) include better materials, often real bark, lichen, and small ceramic detail pieces, and they last several years if kept under cover during the wettest months. High-end kits (fifty to one hundred and fifty pounds) are essentially miniature woodworking sets with proper joinery, real wood, kiln-fired ceramic accents, and a finish that survives many British winters. The Magikitos recommendation is to skip the cheap kits unless you’re working with very young children, because they teach the wrong lessons about how a fairy garden should age.
If you’re feeling braver, you can also bypass the kits entirely and source materials yourself. A walk through any British woodland in autumn gives you all the bark, twigs, acorn caps, and lichen you need for a starter house, and most homeware shops sell air-dry clay for a few pounds. The kit shortcut is convenient. The from-scratch method is more rewarding and produces a more characterful house.
How do you start a fairy garden from scratch?
In four steps, manageable in a single afternoon. First, pick your container or location: a wide shallow terracotta pot for a portable garden, a corner of a flower bed for a semi-permanent one, or a hollow at the base of an existing tree for a wild one. Second, lay your foundation: a layer of small stones for drainage if it’s a pot, then a thin layer of soil mixed with sand, then a topping of moss or dwarf creeping plants for the green carpet. Third, place the structural pieces: the house or door first, then the path leading to it, then the bench, the lamp, the well. Fourth, add the details: a tiny ceramic bowl, a sprig of fresh moss in the corner, a small flat pebble inscribed with a single word (welcome, dreams, mischief), and any small natural objects you’ve picked up that feel right. That last step is the one that turns a kit assembly into a fairy garden.
What plants work best in a fairy garden?
Anything small, slow-growing, and tolerant of low water and low maintenance. The British classics are mosses (especially sphagnum and feather moss), houseleeks (sempervivums, which thrive in shallow containers), creeping thymes, dwarf sedums, small ferns like the hart’s tongue or the parsley fern, and miniature ivies like Hedera helix Spetchley. Avoid anything that grows quickly or needs heavy feeding, because they’ll dwarf the structural pieces in a season. Avoid annuals entirely (the garden would look bare every winter). The goal is a green carpet that stays roughly the same year after year, with seasonal variation in the moss colour and the occasional flower spike from a thyme or sedum.
For indoor fairy gardens (which are increasingly popular in UK flats with no outdoor space), you’ll want even more compact options: succulents in the gasteria and haworthia families, baby tears (Soleirolia soleirolii), and pilea cadierei for a slightly larger leaf. These give you the same green-carpet feel as outdoor mosses and survive on a bright windowsill with weekly watering. Magikitos rule: indoor fairy gardens dry out faster than you think. Check the moisture every Friday, water on Saturday, never on Sunday.
How do you make a fairy house yourself?
From real natural materials, in two evenings rather than two months. The simplest fairy house starts as a base of three to five pieces of bark, glued together into a rough triangular or square shape. You leave one face open as the entrance. You add a roof of overlapping dried leaves or thin bark strips, glued in layers like real shingles. You drill or cut a small door, attach a tiny wooden circle as a doorknob, and varnish the whole thing with a clear outdoor sealer if it’s going outside. The structural part takes an evening. The decoration (windows from buttons, chimney from an acorn cap, doormat from a leaf) takes a second evening, and that’s the bit that turns a piece of bark into a house.
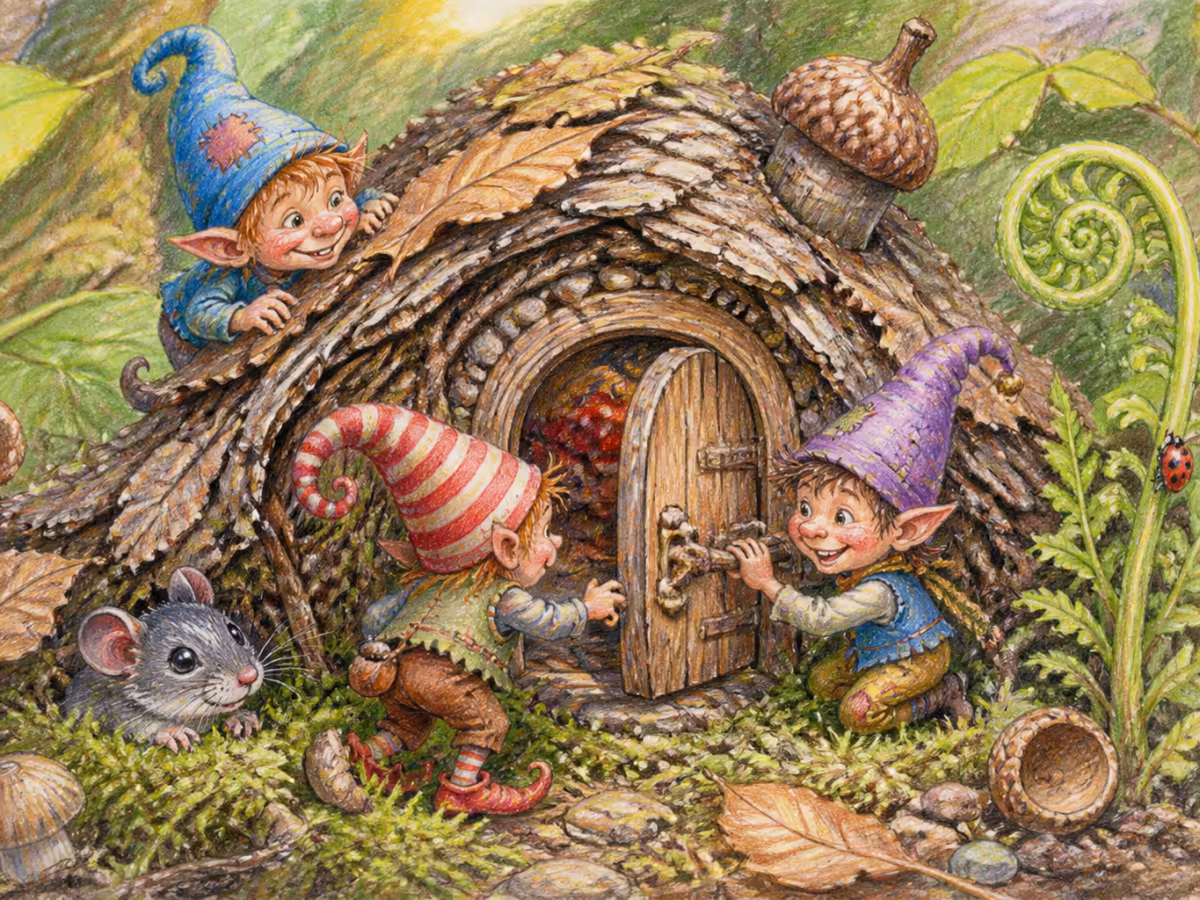
What no one tells you about building your first fairy house is that the door is the hardest part. The rest (the walls, the roof, the chimney) comes together quickly once you’ve solved the door. Our Magikitos advice: don’t obsess over a perfect door. A door slightly too small for the wall it sits in is exactly right, because it suggests the fairy who lives there is even smaller than the house implies.
And once your first house is up, you’ll find yourself collecting bark on every woodland walk for the rest of your life. That’s how it starts.
Should the fairy garden be indoors or outdoors?
Both work, but they’re genuinely different hobbies. An outdoor fairy garden, kept in a shaded corner of the patio or in a hollow of the back garden, develops its own ecosystem over months and years: the moss colonises new patches, the bark weathers, real insects move in, and the garden becomes part of the landscape rather than an object placed in it. The downside is exposure to British weather, which means winter dieback, slug damage in summer, and a slow ageing of the wooden pieces. An indoor fairy garden, kept on a bright windowsill or a side table, stays cleaner and more controlled, ages less dramatically, and gives you something to tend to over a cup of tea on Sunday afternoons. The downside is that it doesn’t breathe in quite the same way, and the moss tends to look the same week after week.
If you’re asking the Magikitos which we prefer, the honest answer is both, in different rooms. An outdoor fairy garden in the back patio for the seasonal drama, and a smaller indoor one on the kitchen windowsill for the daily companionship. The two complement each other, and the cost difference is minimal if you already have a few pots.
How much should a starter fairy garden cost?
Between fifteen and seventy pounds, depending on how much you want to source yourself versus buy ready-made. A from-scratch starter (terracotta pot, soil, moss from your own garden, bark and twigs from a woodland walk, one handcrafted door from a Magikitos workshop) lands around fifteen to twenty-five pounds. A semi-curated starter (terracotta pot, dwarf plants from a garden centre, one or two artisan pieces from a workshop, plus a few small accessories like a bench and a lamp) sits between thirty and fifty pounds. A fully curated starter (an artisan miniature house with a real door, a complete plant selection, multiple accent pieces, a quality container) sits between fifty and seventy pounds, and gives you something that looks finished from day one. The Magikitos suggestion for first-timers: start with the middle option. You get the satisfaction of building something but with enough quality pieces to make the result feel intentional.
A fairy garden isn’t a craft project that ends. It’s a relationship that develops over months and years between you, your plants and the small creatures you’re inviting in.
The Magikitos, from the workshop in Taramundi
How do you keep a fairy garden alive year-round?
By treating it like a small ecosystem rather than a static display. Water gently and inconsistently: too much water rots the moss, too little kills the houseleeks. Once a week is usually right, less in winter, more in dry spells of summer. Refresh the moss patches each spring with a small sheet of fresh moss from the same garden or a quiet woodland (with permission and within sustainable limits). Bring any unsealed wooden pieces under cover for the worst winter weeks, especially January and February in most of the UK, to extend their life from three years to ten or more. Replace any plants that have died over winter, but resist the urge to overhaul the garden completely each spring: half the charm is the continuity of certain pieces year after year.
One last Magikitos secret: never explain the fairy garden to a visitor who hasn’t asked about it. Let them notice it themselves. Watch them lean in closer, going away with the fairies for a moment as they spot the tiny bench, the pebble path, the ceramic bowl. The conversation that follows is always better than anything you could have scripted. That quiet moment of discovery is the whole point.